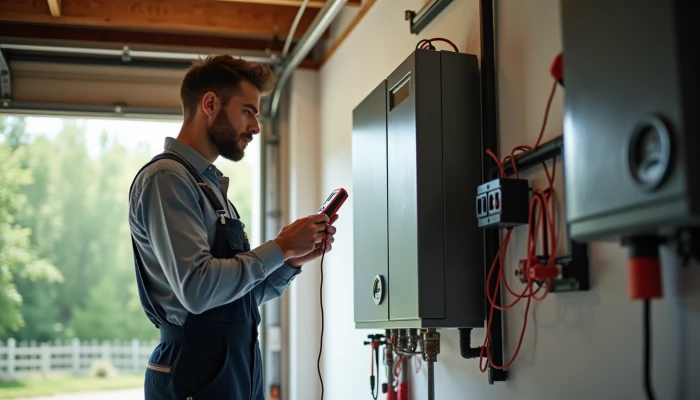
How to Check Your Backup Battery Without Specialized Test Gear
A backup battery is easy to ignore until the power goes out. That is exactly when hidden problems show up: weak connections, a battery that no longer holds charge well, or a system that looks fine but sags under real use.
For homeowners using a home battery backup, a portable power station, or a small battery backup for home essentials, the goal is not perfect lab-grade diagnosis. It is to catch obvious problems early and build a realistic sense of whether the battery is ready for an outage.
The good news is that you can do a useful first-pass check with simple methods. A visual inspection can reveal damage or corrosion. A basic multimeter can show open-circuit voltage and whether voltage drops sharply during a short load. These steps do not replace professional testing, but they can help you decide whether your system looks healthy, needs closer attention, or should be checked by a qualified technician.
Visual Inspection Techniques for Battery Health
A visual check is the simplest place to start, and it often catches issues that make any electrical reading less meaningful. If terminals are corroded or a cable is loose, the problem may be connection quality rather than the battery cells alone.
Before touching anything, power the system down if the manufacturer instructions allow it, and make sure you can see the battery area clearly. Then look for a few basic warning signs.
- Corrosion on terminals or connectors
- Swelling, bulging, or distortion of the battery case
- Cracks, leaks, or residue around seams
- Burn marks, melted insulation, or discolored wiring
- Loose cable ends or damaged terminal hardware
- Labels showing age, model, or capacity that may help with later troubleshooting
Corrosion matters because it can increase resistance and interfere with charging or discharge. Swelling or leaking matters even more, because it can point to internal damage or unsafe operating conditions.
If your setup is a sealed home battery backup or a portable power station, you may not be able to inspect individual cells. That is normal. In that case, focus on the outer casing, vents, cables, plugs, and any error lights or status indicators.
A simple inspection checklist can help you stay consistent.
| Checkpoint | What to look for | Why it matters |
|---|---|---|
| Battery case | Swelling, cracks, leaks | May indicate internal damage |
| Terminals | Corrosion, looseness | Can cause poor performance or false symptoms |
| Wiring | Fraying, heat damage, cuts | Safety and reliability issue |
| Labels | Age, voltage, capacity | Helps compare test results to specs |
| Indicators | Fault lights, warning codes | May point to system-level issues |
If you find swelling, leaking, or obvious heat damage, stop there. That is not a good candidate for DIY testing beyond observation.
Voltage Measurement Methods with Basic Tools
After the visual check, voltage testing gives you a more useful baseline. For most homeowners, this means using a digital multimeter to measure battery voltage at rest and, if appropriate, during a brief load.
The first reading is open-circuit voltage, often called OCV. This is the battery voltage when it is not actively charging or powering a load. In general, a battery that has been fully charged and allowed to rest should read closer to its expected nominal full-charge range than a weak or partially charged battery. The exact number depends on battery chemistry and system design, so compare your reading with the manufacturer guidance rather than relying on a universal chart.
A simple sequence looks like this.
- Fully charge the battery if possible.
- Let it rest disconnected from charging and major loads if the manufacturer instructions allow it.
- Set the multimeter to DC voltage.
- Place the probes on the correct positive and negative terminals.
- Record the reading.
- Compare that number with the battery or system documentation.
A second useful check is a brief voltage-under-load observation. This is not the same as a professional load test, but it can reveal obvious weakness. The idea is simple: watch whether voltage drops sharply when the battery powers a known device or system function.
For example, if a battery backup for home essentials is powering a small load, or if a solar generator is running a modest appliance within its normal operating range, you can note the voltage before and during that load. A noticeable drop is expected. A severe or immediate drop may suggest reduced capacity, poor connections, or a battery that is no longer performing well.
Keep these limits in mind.
- Do not guess at safe voltage ranges for your battery chemistry.
- Do not create a heavy improvised load just to force a test.
- Do not bypass built-in protections on a sealed battery system.
- Do not treat one voltage reading as a full measure of remaining capacity.
Voltage checks are most useful when repeated over time. A single reading is a snapshot. Several readings taken under similar conditions can show whether performance is stable, drifting, or getting worse.
Comparing DIY Testing Approaches to Professional Methods
DIY battery testing is useful, but it helps to be clear about what it can and cannot tell you. At home, you are usually looking for broad signs of health: visible damage, normal-looking voltage, and no dramatic voltage during a modest load.
Professional testing goes further. A controlled load test applies a known demand and measures how well the battery maintains voltage under that demand. Capacity testing can go deeper still by measuring how much usable energy the battery can actually deliver over time. Those methods are more precise, but they also require proper equipment, more time, and in some cases more energy removed from the battery during testing.
This comparison can help set expectations.
| Method | What it tells you | Main advantage | Main limitation |
|---|---|---|---|
| Visual inspection | Obvious physical problems | Fast and free | Cannot confirm true capacity |
| Open-circuit voltage | Basic charge state clues | Easy with a multimeter | Limited insight into performance under load |
| Brief voltage-under-load check | Whether voltage sags noticeably in use | More realistic than OCV alone | Not standardized or highly precise |
| Professional load test | Performance under controlled demand | Better diagnostic accuracy | Requires equipment or service |
| Capacity test | How much energy the battery can deliver | Best for deeper health assessment | More time-consuming and can significantly discharge the battery |
For many homeowners, the practical question is not whether DIY testing is perfect. It is whether DIY testing is enough for the decision in front of you.
DIY checks are often enough when:
- You want a routine condition check
- The system appears normal and has no fault warnings
- You are comparing current readings with your own past readings
- You need to confirm whether a battery seems obviously weak before seeking service
Professional testing is more appropriate when:
- The battery supports critical loads during outages
- You see repeated fault codes or unusual behavior
- Voltage readings seem inconsistent or confusing
- The battery drops off quickly in real use even after charging
- Physical damage, swelling, or overheating is present
That middle ground matters. A homeowner can do meaningful screening without claiming that a home test is equal to a professional load test.
Safety Practices for Battery Testing
Battery testing should stay boring. If a test setup feels improvised, rushed, or unclear, stop and reset before continuing.
Basic safety guidance commonly emphasizes avoiding direct contact with exposed terminals, especially on damaged batteries. It also makes sense to keep the area ventilated, dry, and clear of flammable materials. Even a simple multimeter check can go wrong if probes slip or metal tools bridge the terminals.
Use this short safety checklist before testing.
- Read the battery or system manual first
- Remove metal jewelry if you will be working near exposed terminals
- Use insulated tools when possible
- Wear gloves if corrosion is present
- Keep children and pets away from the work area
- Do not test a battery that is leaking, swollen, cracked, or unusually hot
- Stop if you smell burning, see smoke, or notice rapid heating
For larger home battery backup systems, built-in monitoring may already provide useful health or fault information. If your system has an app, display panel, or alert history, check that before doing manual tests. Monitoring does not replace inspection, but it can help you spot patterns such as repeated low-voltage warnings or charging issues.
One more practical rule: do not force access to parts of a sealed unit. Many portable power station and solar generator products are designed to keep users away from internal battery components. If the only safe access point is the external output and status display, stay there.
When in doubt, the safest DIY test is often the least invasive one: inspect, read system indicators, measure accessible voltage if the design allows it, and get qualified help for anything beyond that.
Conclusion
A useful home battery check does not need to be complicated. Start with a visual inspection. Follow with a basic voltage reading. If it makes sense for your setup, observe how the voltage behaves during a short, normal load.
That combination gives many homeowners a practical baseline for home battery backup reliability. It can help you catch loose connections, visible damage, or signs that a battery is no longer holding up well.
Just keep the limits clear. DIY methods are screening tools, not full diagnostics. If the battery supports critical outage loads, shows physical damage, or behaves unpredictably, professional testing is the better next step.