Older Home, Tight Budget: Weatherization Steps That Work with the Hvac You Already Have
Older homes often feel drafty, uneven, and expensive to heat or cool. But that does not automatically mean you need to replace your furnace, boiler, or air conditioner first. In many cases, the more practical starting point is weatherization: reducing uncontrolled air leaks, improving insulation, and fixing the parts of the building shell that make existing HVAC systems work harder than they should.
That matters for both comfort and home energy resilience. A house that holds temperature better is usually easier to keep livable during outages, cold snaps, or heat waves, even when your equipment stays the same.
The key is to avoid one-size-fits-all advice. Older homes vary a lot in layout, materials, and problem areas. A good plan starts with identifying where your home is actually losing energy, then prioritizing the upgrades most likely to help within your budget.
The Role of Energy Audits in Identifying Upgrade Priorities
An energy audit helps you avoid spending money in the wrong order. Instead of guessing, you get a home-specific picture of where air is leaking, where insulation is missing or underperforming, and whether your existing HVAC system is being undermined by the house around it.
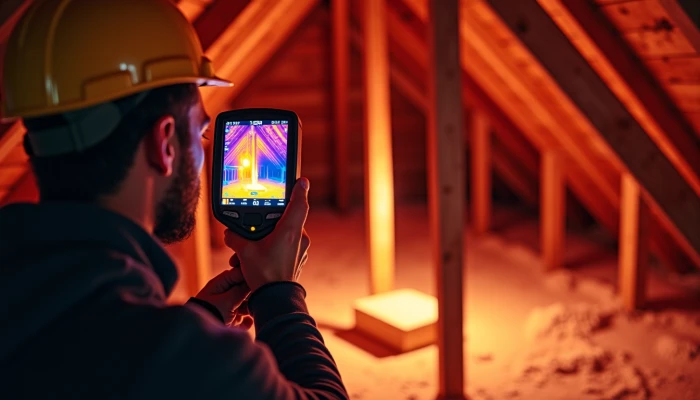
A professional audit may include a blower door test, visual inspection, infrared scanning, duct checks, and a review of utility use. The point is not to create a perfect technical model. It is to identify the biggest weak spots first.
For older homes, those weak spots are often surprisingly basic:
- attic bypasses around wiring, plumbing, and light fixtures
- leaky attic hatches or pull-down stairs
- gaps at rim joists and foundation penetrations
- poorly sealed window and door trim
- disconnected or uninsulated duct sections in attics or crawl spaces
An audit also helps set realistic expectations. Source-backed guidance on sealing and insulating homes suggests meaningful savings are possible on average, but not every house will respond the same way. A drafty attic with little insulation may offer a stronger return than a house that already had partial upgrades years ago.
If a full audit is out of reach, look for state, utility, or weatherization programs that offer low-cost or no-cost assessments. Some public programs and utility partners use audits as the entry point for rebates or direct-install improvements.
Use this simple priority framework after an audit.
| Upgrade area | Usually worth prioritizing when | Why it matters |
|---|---|---|
| Air leaks into attic or crawl space | Drafts, dust, uneven rooms, high heating/cooling use | Leaks can reduce comfort and waste conditioned air |
| Attic insulation | Insulation is thin, patchy, or below local recommendations | Often one of the simpler retrofit opportunities |
| Duct sealing or repair | Ducts run through unconditioned spaces | Helps existing HVAC deliver air more effectively |
| Windows and doors | Obvious gaps or failed weatherstripping | Good for comfort, but often lower priority than attic work |
A practical sequence usually works better than scattered fixes. Start with the audit, identify the largest losses, then tackle shell improvements before assuming the HVAC itself is the main problem.
Air Sealing Techniques for Older Homes
Air sealing is often the most immediate weatherization step because it targets the drafts and hidden leaks that make old houses uncomfortable. It also works with the HVAC you already have by reducing the amount of outdoor air your system has to constantly reheat or recool.
The most useful mindset is to think in layers. You are not trying to make an old home perfectly airtight overnight. You are trying to reduce the largest uncontrolled leaks first.
Common trouble spots include:
- attic access panels and pull-down stairs
- plumbing and wiring penetrations
- recessed lights and ceiling fixtures below the attic
- window and door trim gaps
- baseboards on exterior walls
- basement or crawl space rim joists
- foundation penetrations for pipes, cables, and vents
For many households, the first round can be DIY. Caulk works well for narrow, stable gaps. Weatherstripping helps around operable doors and attic hatches. Expanding foam can help around penetrations, though it needs careful use. Larger gaps, inaccessible cavities, or combustion-related safety concerns are better handled by a contractor.
A few practical rules help avoid wasted effort:
- Seal the attic floor plane before adding more attic insulation.
- Focus on hidden leakage paths, not just the draft you can feel at a window.
- Do not block intentional ventilation or combustion air pathways.
- If your home has moisture issues, address those alongside sealing work.
Implementation guidance commonly emphasizes that air sealing and insulation work best together. Sealing without insulating can leave major heat loss in place. Insulating without sealing can mean warm or cool air still escapes through the same holes.
If you want a simple room-by-room checklist, start here.
- Check for visible daylight or moving air around doors, attic hatches, and trim.
- Inspect basement and crawl space penetrations where utilities enter.
- Look in the attic for dark insulation tracks, which can hint at air movement.
- Seal accessible gaps with the right material for the gap size and location.
- Reassess comfort before moving on to smaller, lower-impact fixes.
Some guidance aimed at older homes notes that weatherization and insulation can significantly reduce HVAC load. That does not mean every home will see the same result, but it does support air sealing as a practical first move before considering more disruptive upgrades.
Attic Insulation Strategies for Maximum ROI
In many older homes, the attic is the clearest place to improve insulation without tearing open finished walls. It is also one of the easiest places to get the order of work wrong.
The first rule is simple: seal before you insulate. If penetrations around pipes, wiring, duct chases, and top plates are left open, adding more insulation can bury the problem rather than solve it.
After air sealing, check the current insulation depth and condition. In some homes, existing insulation is thin, uneven, compressed, or missing in sections. In others, there may be enough material in some areas but major gaps around edges, eaves, or access points. Local climate and code guidance matter here, so use regional recommendations rather than assuming one R-value fits every house.
For many retrofit situations, blown-in cellulose or fiberglass is used because it can cover irregular attic floors and existing materials relatively efficiently. The right choice depends on budget, installer quality, moisture conditions, and whether the attic has storage or service access needs.
This is a practical attic strategy for older homes:
- Confirm roof leaks or moisture problems are addressed first.
- Air seal penetrations and attic access points.
- Protect recessed fixtures or vents where required.
- Mark safe walkways or service paths if equipment is in the attic.
- Add insulation to an appropriate depth for your climate and attic design.
A few mistakes are common enough to watch for.
| Mistake | Why it causes problems | Better approach |
|---|---|---|
| Adding insulation before sealing | Air still escapes through hidden gaps | Seal penetrations first |
| Blocking ventilation paths | Can contribute to moisture or roof issues | Maintain required vent channels |
| Compressing existing insulation | Reduces effective performance | Add evenly without crushing material |
| Ignoring ductwork in the attic | Conditioned air can be lost before it reaches rooms | Inspect and seal accessible ducts |
Evidence and field guidance both suggest attic work can offer a strong return compared with more expensive equipment changes, especially in older housing stock with obvious deficiencies. But returns are not unlimited. At some point, additional insulation gives diminishing benefits, which is another reason to use an audit or contractor assessment rather than assuming more is always better.
For budget-conscious households, the best attic upgrade is usually not the thickest possible insulation package. It is the one that fixes major leakage, reaches a sensible target for your climate, and avoids installation mistakes that reduce the value of the work.
Leveraging Rebates and Incentives for Weatherization
Weatherization gets easier to justify when you do not have to pay the full cost alone. Rebates, utility incentives, weatherization assistance, and low-interest financing can reduce the upfront burden, especially for air sealing and insulation work.
The challenge is that programs vary a lot by state, utility, and income eligibility. That means the most useful approach is not to memorize one national offer. It is to check the programs that apply to your address before you schedule work.
Examples from public and state-supported programs show a few common patterns:
- free or reduced-cost energy audits through utilities or weatherization providers
- rebates for bundled air sealing and insulation work
- weatherization assistance for qualifying households
- low-interest loans for approved efficiency improvements
Some state programs advertise set rebate amounts for insulation and air sealing packages, while others route support through local utilities or electric cooperatives. There are also financing programs that can spread costs over time for eligible efficiency improvements.
Before you hire anyone, gather these details.
- Whether a pre-approval or participating contractor is required
- Whether the rebate covers materials, labor, or both
- Whether an audit or post-work verification is needed
- Whether income-based programs offer deeper support than standard rebates
- Whether loans are available if rebates do not cover enough of the cost
A simple rebate workflow can help keep things organized.
- Check your state energy office, utility, and local weatherization provider.
- Confirm which upgrades qualify before signing a contract.
- Ask contractors to separate line items for air sealing, insulation, and any related repairs.
- Save audit reports, invoices, model numbers if required, and proof of payment.
- Submit paperwork promptly and track deadlines.
This step matters because incentives can change the order of what makes sense. A modest attic project may become more attractive if a rebate covers part of the labor. Likewise, a low-interest loan may make it possible to bundle air sealing and insulation instead of doing only partial work now and paying more later.
The practical goal is not to chase every program. It is to use available support to make the highest-priority weatherization steps more affordable and easier to complete correctly.
Conclusion
Older homes do not need a full mechanical overhaul before they can become more comfortable and efficient. In many cases, the better first move is to tighten the building shell around the HVAC system you already have.
That usually means a straightforward sequence:
- get an energy audit or assessment
- seal the biggest air leaks first
- improve attic insulation after sealing
- use rebates, assistance, or financing where available
This approach supports home energy resilience because it helps your home hold conditioned air longer, reduces avoidable waste, and improves comfort without assuming every house needs the same solution.
The most reliable results come from matching each step to the actual conditions in your home. If you use audit findings, local guidance, and qualified help where needed, weatherization can be a practical upgrade path instead of a major renovation project.