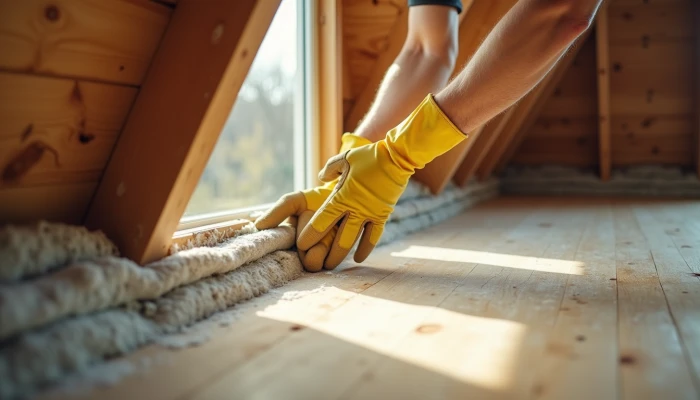
Why DIY Insulation Upgrades Miss the Mark
A lot of DIY insulation projects start with a sensible goal: lower heating and cooling losses without taking on a full remodel. But insulation only works well when it is installed carefully and paired with basic air sealing. If there are gaps, compressed batts, missed duct leaks, or the wrong material in the wrong place, the upgrade may look finished while still underperforming.
That matters for comfort, utility costs, and home energy resilience. A better-insulated home usually holds indoor temperatures longer during outages and puts less strain on heating and cooling equipment in normal use. This guide focuses on the common myths that lead DIY projects off track, how to choose materials more carefully, and how to verify whether your work actually improved performance.
Common DIY Insulation Mistakes and Their Impact
One of the biggest myths in DIY insulation is that more material automatically means better results. In practice, insulation works best when it fills the intended space evenly. If fiberglass batts are compressed to fit, their thermal performance drops. If loose-fill insulation is uneven, thin spots can become weak points where heat moves more easily.
Another common myth is that insulation alone stops drafts. It usually does not. Many insulation products slow heat transfer, but they do not reliably stop air movement. That means small openings around plumbing penetrations, wiring, attic hatches, rim joists, recessed lights, and framing joints can keep leaking conditioned air even after new insulation is added. In many homes, sealing gaps is the step that determines whether insulation performs as expected.
Moisture is another area where DIY projects can go wrong. Improper vapor barrier placement, blocked ventilation paths, or overstuffed material in the wrong assembly can trap moisture. That can lead to damp insulation, reduced performance, and in some cases mold or material damage. The right approach depends on where the insulation is going and how the assembly is meant to dry.
A simple way to think about the most common mistakes is this table.
| Mistake | Why it hurts performance | Better DIY approach |
|---|---|---|
| Compressing batts | Reduces effective R-value | Cut and fit batts to the cavity instead of forcing them |
| Leaving gaps or voids | Creates thermal weak spots | Fill cavities evenly and trim around obstructions |
| Skipping air sealing | Lets heated or cooled air escape | Seal penetrations and joints before insulating |
| Using the wrong material | Can cause poor fit or moisture issues | Match the product to the location and assembly |
| Ignoring ducts or bypasses | Leaks can offset insulation gains | Seal accessible ductwork and major attic bypasses |
| Installing vapor control incorrectly | Can trap moisture | Follow assembly-specific guidance for your climate and location |
If your goal is better weatherization, the takeaway is straightforward: insulation is not just about adding thickness. It is about continuity, fit, and air control. Missing those details is why many DIY upgrades feel less effective than expected.
Choosing the Right Materials and Installation Techniques
There is no single insulation product that is right for every home or every project. Proper insulation materials depend on location, budget, access, moisture conditions, and whether you are insulating an attic floor, wall cavity, crawlspace, basement rim joist, or ducts.
Fiberglass batts can be practical for open cavities when careful cutting and fitting are possible. Cellulose can work well for covering irregular attic areas because it can settle around obstacles more completely. Spray foam can help with both insulation and air sealing in some applications, but it is usually less forgiving as a DIY material and may be better left to trained installers, especially for larger jobs.
Material choice is only part of the job. Installation quality often matters just as much. A lower-cost material installed carefully can outperform a more expensive one installed poorly.
Use this sequence before adding insulation.
- Identify the area you are insulating and check whether moisture, ventilation, or combustion-safety issues need to be addressed first.
- Look up the recommended R-value range for your climate zone and assembly rather than guessing.
- Seal obvious air leaks before insulation goes in.
- Choose a material that fits the space without excessive compression or awkward gaps.
- Install evenly, especially around wiring, pipes, framing edges, and access hatches.
- Check nearby ducts, bath fan penetrations, and wall or tub/shower air barriers if they are accessible.
Some locations deserve extra caution.
- Attics: Air sealing usually comes first. Recessed fixtures, top plates, plumbing stacks, and attic hatches are common leakage points.
- Walls: Batts need full contact with the cavity surfaces and should be split neatly around wires rather than stuffed behind them.
- Bathrooms and tubs on exterior walls: Missing or poorly installed air barriers are a known weak point.
- Duct runs in unconditioned spaces: Sealing duct joints can matter as much as adding insulation nearby.
This is also where one-size-fits-all advice breaks down. The right R-value and assembly details vary by climate and home design. A cold-climate attic, a humid-climate crawlspace, and a mixed-climate wall retrofit may all call for different choices. If you are unsure whether a space needs ventilation, vapor control, or a specific installation method, that is a good point to pause and get local guidance rather than guessing.
For households thinking about backup power, this work has a side benefit: reducing heat loss can make a home easier to keep comfortable during an outage. That does not replace a generator, portable power station, or solar generator, but it can reduce how quickly indoor conditions drift when heating or cooling is interrupted.
Verifying Energy Savings and Avoiding Pitfalls
Another persistent myth is that if insulation was added, savings must have happened. Real performance is harder to judge than that. Weather, thermostat settings, occupancy, and other upgrades can all affect utility use. That is why energy savings verification matters, especially if you are trying to decide whether to keep doing DIY weatherization work.
A practical first step is to document conditions before the project. Note the area insulated, the material used, and any air sealing completed. Take photos if accessible. Then compare over time instead of relying on a single month of bills.
Here are sensible ways to verify results.
- Review utility bills across comparable heating or cooling seasons, not just one statement.
- Pay attention to comfort changes such as fewer drafts, more even room temperatures, or slower indoor temperature swings.
- Use a home energy calculator or audit tool to estimate how insulation levels and air leakage affect overall use.
- If available locally, consider a professional energy audit or blower door test for a clearer picture of leakage and priority areas.
A simple tracking checklist can help.
- Area insulated
- Material and labeled R-value
- Air leaks sealed before installation
- Duct leaks checked if accessible
- Photos of before and after
- Utility bill notes for similar months
- Comfort observations during hot or cold weather
It is also important to avoid false conclusions. If bills do not drop right away, that does not always mean the project failed. A harsher season, different occupancy, or changes in equipment use can mask the effect. On the other hand, if a project looks complete but comfort barely improves, that may point to missed air leaks, insufficient coverage, or the wrong priority area.
This is where climate-specific guidance matters. Recommended insulation levels differ by region, and some homes lose more energy through air leakage or duct problems than through low insulation alone. In those cases, adding more insulation without fixing the leakage path may produce disappointing results.
If you want the most realistic picture, combine three checks: visual inspection, seasonal bill tracking, and at least one structured audit tool. That approach will not give a number, but it will give you a more honest read on whether the upgrade improved efficiency and resilience.
Conclusion
DIY insulation can be worthwhile, but it is rarely just a matter of rolling out batts and calling it done. The projects that perform better usually have the same basics in common: careful planning, sealing gaps before insulating, matching materials to the space, and avoiding shortcuts that create voids, compression, or moisture problems.
If you are working room by room, think of insulation as part of a broader weatherization process rather than a standalone fix. That mindset helps you make more practical upgrades, improve comfort, and support home energy resilience without assuming every house needs the same solution.
And if a space involves unclear moisture risks, difficult access, or confusing assembly details, bringing in an energy auditor or insulation professional can be the most cost-conscious move. The goal is not perfection. It is making sure the work you do actually works.