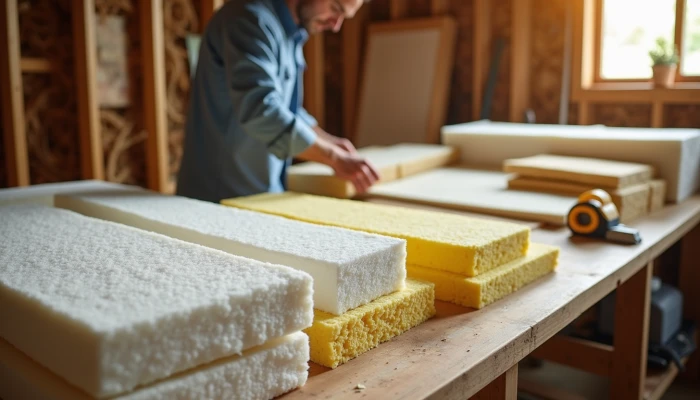
How to Insulate a Cold Home on a Tight Budget
Cold rooms, drafty walls, and high winter utility bills often push people toward expensive whole-home upgrades. But many homes can get meaningful comfort and efficiency improvements from simpler insulation work, especially when you focus on the biggest heat-loss areas first.
This guide is built for homeowners and renters looking for practical, budget-friendly options rather than perfect solutions. It covers insulation basics, compares common materials, and walks through DIY-friendly approaches for attics, walls, and basements in cold climates.
The goal is not to promise a specific payoff. It is to help you make better decisions for comfort, lower energy waste, and stronger home energy resilience with realistic tradeoffs in mind.
Understanding Insulation Basics: R-Values and Material Comparisons
Insulation works by slowing heat flow. The main metric used to compare materials is R-value, which measures thermal resistance. In simple terms, a higher R-value means better resistance to heat loss for a given thickness.
That does not mean the highest R-value material is always the right choice. Cost, air leakage, moisture conditions, and how well the material fits the space all matter. In cold climates, installation quality is especially important because gaps and air movement can reduce real-world performance.
Here is a simple comparison of common insulation materials.
| Material | Typical R-value per inch | General cost range | DIY fit | Main tradeoff |
|---|---|---|---|---|
| Fiberglass batts | R-2.2 to R-3.8 | $0.30 to $1.00 per sq ft | Good for open cavities | Can underperform if compressed or installed with gaps |
| Blown-in cellulose | About R-3.5 | $0.50 to $1.20 per sq ft | Good for attics, harder for walls | Can settle over time |
| Closed-cell spray foam | About R-6 to R-7 | Higher than batt or cellulose | Usually limited DIY use | Higher upfront cost |
| Rigid foam board | About R-5 per inch | Varies by type and thickness | Good for basements and targeted areas | Requires careful cutting and air sealing |
For cold-climate homes, cellulose is often favored in attics and dense-packed wall cavities because it can reduce air movement better than loose fiberglass. Fiberglass batts can still be a practical low-cost option, especially where wall or ceiling cavities are open and you can install them neatly without compression.
Spray foam stands out for combined insulation and air sealing, but the price is usually much higher. For many budget-focused households, it makes more sense as a targeted material for rim joists, awkward gaps, or problem areas rather than a whole-house DIY strategy.
If you are trying to improve home energy resilience, remember that insulation and air sealing support each other. Better insulation helps your home hold indoor temperatures longer during outages, which can matter just as much as backup equipment in winter.
Affordable DIY Insulation Materials for Cold Climates
If your budget is limited, the most practical question is usually not "What is the best insulation?" but "What gives me the most useful improvement for this part of the home?"
For many cold-climate homes, the most affordable starting options are fiberglass batts and blown-in cellulose.
- Fiberglass batts are widely available, relatively inexpensive, and manageable for DIY work in unfinished attics, open wall cavities, and some floor assemblies.
- Blown-in cellulose often costs a bit more, but it can be a strong value in attics because it fills irregular spaces better and can perform well in cold conditions.
- Rigid foam board is often a smart targeted upgrade for basement walls and rim joists where moisture and conductive heat loss matter.
- Spray foam is usually the least budget-friendly option, so it works better as a selective fix than a default recommendation.
In very cold conditions, air movement through or around insulation becomes a bigger issue. That is one reason dense-packed cellulose is often recommended over fiberglass in some applications. Fiberglass can still work well, but it is less forgiving if the cavity is leaky or the installation is sloppy.
Material lifespan matters too, but it should not be treated as the only decision factor. Available guidance suggests cellulose may last around 20 to 25 years, while fiberglass can perform well for 25 to 30 years. In practice, moisture problems, air leaks, and poor installation can shorten useful performance for either one.
A simple way to choose is to match the material to the space.
| Area | Lowest-cost common option | Often better cold-climate option | What to watch for |
|---|---|---|---|
| Open attic floor | Fiberglass batts | Blown-in cellulose | Wind washing, uneven coverage, air leaks below |
| Open wall cavity | Fiberglass batts | Dense-pack cellulose | Gaps, compression, missing vapor control where needed |
| Basement wall | Fiberglass is usually less ideal | Rigid foam board | Moisture management and fire-code covering needs |
| Rim joist | Fiberglass is often weak here | Rigid foam or spray foam | Air sealing around edges |
If you rent, your options may be smaller, but they still matter. Draft-stopping steps, temporary window insulation film, outlet gaskets on exterior walls where allowed, and door sweeps can support comfort even if you cannot open walls or add attic insulation. Those are not substitutes for full insulation, but they can reduce wasted heat.
Step-by-Step Installation Tips for Key Areas
The biggest DIY wins usually come from the attic, accessible wall cavities during repairs, and basement or foundation areas. Before adding insulation anywhere, deal with obvious air leaks first. Otherwise, warm indoor air can still escape around the insulation.
Use this sequence before you start.
- Identify the coldest or draftiest areas.
- Check for moisture issues, roof leaks, or wet materials.
- Seal accessible air leaks around penetrations, wiring, plumbing, and trim gaps.
- Measure cavity depth or available space.
- Choose insulation that fits the area, not just the price.
Attic
Attics are often the highest-impact DIY area because heat rises and many older homes are underinsulated overhead. For existing attics, blown-in cellulose is commonly used because it covers irregular surfaces well.
Basic attic approach:
- Wear protective gear and verify the attic is dry.
- Seal penetrations at the attic floor before adding insulation.
- Protect recessed lights or heat-producing fixtures if required by code and product instructions.
- Keep soffit vents clear with baffles so ventilation is not blocked.
- Add insulation evenly across the attic floor.
Guidance commonly points to roughly 10 to 12 inches of cellulose for about R-35 to R-40, though local climate targets and existing insulation levels vary. In colder regions, recommended attic R-values may be higher, so check local guidance before deciding where to stop.
Walls
Wall insulation is more difficult as a DIY project unless the wall cavity is already open during a remodel or repair. If the cavity is open, fiberglass batts can be a practical low-cost option. Dense-pack cellulose can be effective in enclosed walls, but installation is harder to do well without the right equipment.
Basic wall approach:
- Confirm the cavity is dry and free of bulk water issues.
- Fit batts snugly without compressing them.
- Cut around wiring and boxes instead of stuffing insulation behind them unevenly.
- Fill the full cavity depth consistently.
- Use vapor control only as appropriate for your wall assembly and climate guidance.
The main mistake is leaving voids. Even small gaps can reduce performance more than many people expect.
Basement
Basements and foundation walls can feel cold even when the rest of the house is insulated reasonably well. Rigid foam board is often used here because it provides a solid R-value per inch and can help reduce thermal bridging on masonry or concrete surfaces.
Basic basement approach:
- Fix water intrusion first.
- Clean and dry the wall surface.
- Cut foam boards carefully to fit.
- Attach them according to product guidance.
- Seal seams and edges to reduce air leakage.
- Check whether a fire-rated covering is required in your area.
For many homes, basement insulation improves comfort near floors above and can make the house feel less drafty overall. It can also support backup power planning indirectly, because a better-insulated home loses heat more slowly during outages, reducing pressure on a battery backup for home loads such as a blower, small heater-compatible system component, or backup power for fridge use during short disruptions.
Tradeoffs and Limitations of DIY Insulation
DIY insulation can be worthwhile, but it is not a cure-all. The biggest limitation is that insulation alone does not solve every comfort problem.
Cellulose can settle over time, with some guidance suggesting roughly 5 to 10 percent settling over a long period. That does not make it a poor choice, but it does mean coverage depth matters, especially in attics.
Fiberglass is affordable and common, but it can underperform if air moves through it or around it. In cold climates, that makes air sealing especially important near attic penetrations, window trim, sill plates, and electrical outlets on exterior walls.
Here are common DIY mistakes to avoid.
| Mistake | Why it matters | Better approach |
|---|---|---|
| Adding insulation before sealing leaks | Heat still escapes through gaps | Air seal first where accessible |
| Compressing fiberglass batts | Reduces effective performance | Fit batts to cavity depth and shape |
| Blocking attic ventilation | Can create moisture and roof issues | Use baffles and keep vents open |
| Insulating over moisture problems | Can trap damage in place | Fix leaks and dampness first |
| Using one material everywhere | Different areas need different approaches | Match material to attic, wall, or basement |
Another tradeoff is access. Some of the most important wall and floor cavities are hard to reach without opening finishes. That can push a project beyond true DIY territory.
There is also a point where professional evaluation is the better choice. Consider getting help if you find:
- Persistent moisture or mold concerns
- Ice damming linked to attic heat loss and ventilation issues
- Knob-and-tube wiring or other electrical concerns
- Foundation water intrusion
- Uneven temperatures that suggest duct, structural, or air leakage problems beyond insulation alone
Insulation is one part of a broader resilience strategy. It works alongside weatherization, efficient heating, and outage planning. A portable power station or solar generator may help with short-term backup power, but a home that loses heat slowly is easier to keep safe and comfortable during an outage than one that leaks heat quickly.
Conclusion
If you want a budget-friendly place to start, focus on the areas that usually lose the most heat first: the attic, accessible wall cavities, and basement or foundation zones. For many cold-climate homes, cellulose and fiberglass are the most realistic DIY materials, while rigid foam is often useful for basement walls and other targeted spots.
The right choice depends on the space, your budget, and how much air leakage the area has. There is no one-size-fits-all answer, and no material is automatically superior in every part of the house.
A practical plan is to air seal first, insulate the highest-impact areas next, and treat comfort, moisture control, and durability as part of the same project. That approach can improve day-to-day comfort and strengthen home energy resilience without turning the job into an all-or-nothing renovation.