Small Weatherization Fixes That Make a Drafty Home Easier to Live in
A lot of indoor discomfort comes from small air leaks, not just old equipment or poor insulation. Gaps around windows, doors, and trim can let conditioned air escape and outdoor air creep in, making rooms feel colder in winter and harder to cool in summer.
The good news is that some of the most practical fixes are also the simplest. If you want a realistic place to start, no-tool weatherization can help you reduce energy waste, improve comfort, and build better home energy resilience one small project at a time.
This guide focuses on three approachable upgrades: adhesive barrier tape, door sweeps, and caulking. None require a major remodel, and all can work for homeowners or renters if you choose methods that fit your space and lease rules.
Before you start, it helps to do a quick walk-through. Look for visible daylight around doors, feel for moving air near window edges, and check for small cracks where trim meets walls. Those are often the easiest places to improve first.
Adhesive Barrier Tape for Draft Control
Adhesive barrier tape is one of the simplest ways to reduce drafts around windows and some door edges. It is especially useful when you want a low-commitment fix that does not involve drilling, removing trim, or using specialized tools.
Implementation guidance for weather sealing tape commonly emphasizes a few basics: start with a clean, dry surface, use the tape where air is actually leaking, and avoid stretching it tightly during application. Over-tensioning can make the tape lift at the edges over time.
A simple way to apply it is:
- Wipe the frame or sash area so dust and moisture do not interfere with adhesion.
- Find the draft path by feeling for airflow or looking for light penetration around the frame.
- Cut manageable lengths instead of trying to run one long strip all at once.
- Press the tape down gradually, smoothing as you go.
- Check that the window or door can still open if you are not creating a seasonal seal.
This method works well for narrow gaps and seasonal problem spots. Transparent, moisture-resistant tape can be useful where you want a less noticeable fix. For renters, it may also be easier to remove later than more permanent materials, though it is still smart to test a small area first.
Use adhesive barrier tape where it makes practical sense:
- Window edges with noticeable drafts
- Door perimeters that do not need a thicker gasket
- Temporary seasonal sealing in rooms you use less often
- Small leakage points where a larger repair is not possible right now
A few limits matter. Tape is not a substitute for repairing rotted frames, warped windows, or large structural gaps. It also works best on relatively smooth surfaces. If the area is dirty, flaky, or damp, the seal may fail early.
If you are deciding where to start, use this quick priority checklist:
- Seal the room you spend the most time in first
- Fix leaks you can feel, not just ones you suspect
- Start with the side of the home that gets the strongest wind
- Choose the easiest visible gap before moving to less obvious ones
This kind of small sealing project will not replace larger insulation upgrades, but it can make a noticeable comfort difference in the meantime and help your heating or cooling system work a little less hard.
Door Sweep Installation for Energy Efficiency
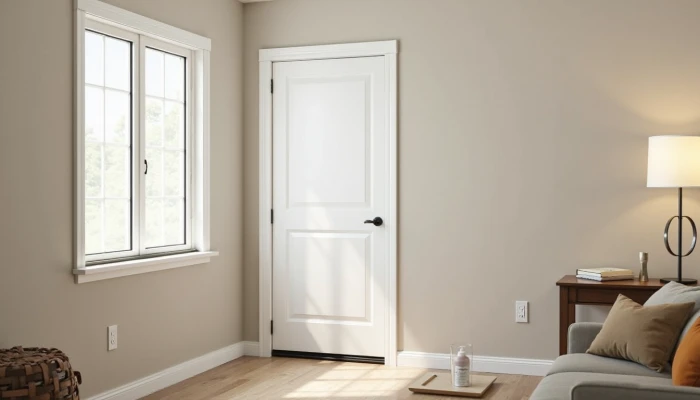
The gap under an exterior door is one of the most common places for unwanted airflow. A door sweep helps block that path by adding a flexible strip along the bottom edge of the door.
This is a practical project because the material cost is usually modest, and many sweep styles can be attached without removing the door. Some guidance sources note that basic door sweeps are often available at relatively low cost, making them one of the more accessible weatherization fixes.
Start by measuring the width of the door and checking the size of the gap underneath. That helps you choose a sweep that will make contact with the threshold without dragging too heavily. Rubber and bristle styles are both common. Rubber tends to create a tighter seal, while bristle styles may glide more easily over some surfaces.
A basic installation sequence looks like this:
- Close the door and inspect the gap from inside and outside.
- Measure the door width.
- Clean the lower door surface so adhesive or fasteners hold properly.
- Align the sweep so it just meets the floor or threshold.
- Press adhesive-backed versions firmly into place, or attach screw-mounted versions carefully if your lease or door type allows it.
- Open and close the door a few times to check for dragging or missed spots.
If the sweep presses too hard, the door may become difficult to close. If it barely touches the threshold, air will still move underneath. The goal is contact without excessive friction.
Here is a simple comparison to help choose a style:
| Sweep type | When it fits well | Tradeoff |
|---|---|---|
| Rubber | Larger air leaks, tighter seal needs | Can drag more on rough thresholds |
| Bristle | Smoother door movement, uneven surfaces | May seal less tightly against strong drafts |
| Adhesive-backed | No-tool installation, temporary or renter-friendly use | Adhesion depends heavily on surface prep |
| Screw-mounted | Longer-term hold | May not suit renters or hollow doors |
Some sources make broad savings claims about door sealing, but results depend on the size of the leak, the condition of the rest of the home, and how often the door is used. It is more accurate to think of a door sweep as a targeted fix that reduces one common source of heating and cooling loss.
This project also supports comfort during short outages. A better-sealed home tends to hold indoor temperatures more steadily for longer, which matters for resilience even if you also keep a portable power station or solar generator for backup essentials. Weatherization and backup power solve different problems, but they work well together.
Caulking Techniques for Sealing Cracks
Caulk helps seal narrow cracks and joints around trim, frames, and other stationary surfaces. Done well, it can reduce air leakage and improve comfort. Done poorly, it can crack, peel, or block places that should stay open.
The first rule is surface preparation. Dust, old loose material, and moisture all make adhesion worse. Before applying new caulk, clean the area and let it dry. If old caulk is failing, remove the loose or damaged sections so the new bead has a stable surface.
Choosing the right type matters too. Practical guidance commonly distinguishes between paintable caulk for trim and finish work, and silicone-based caulk for areas with regular moisture exposure. The right choice depends on location, movement, and whether you plan to paint.
Use this simple workflow:
- Inspect the crack and confirm it is a stationary joint, not a moving part.
- Clean and dry the surface.
- Cut the nozzle for a small bead rather than a large one.
- Apply steady pressure and move at a consistent speed.
- Smooth the bead if needed before it skins over.
- Let it cure according to product directions before painting or exposing it to water.
One common DIY mistake is using too much caulk. Overfilling can look messy and may reduce flexibility, which can lead to cracking later. A smaller, controlled bead usually performs better than a thick one spread over the surface.
Another mistake is sealing the wrong places. Some gaps are meant to drain or allow movement. For example, guidance on window caulking often warns against blocking weep holes or sealing movable joints that need to function properly.
This mistake-to-avoid table can help:
| Mistake | Why it causes problems | Better approach |
|---|---|---|
| Applying caulk to dusty or damp surfaces | Poor adhesion and early failure | Clean and dry first |
| Using the wrong type for the location | Cracking, poor paint finish, or moisture failure | Match the caulk to indoor trim, exterior use, or wet areas |
| Cutting too large a nozzle opening | Messy bead and wasted material | Start small and add only what you need |
| Overfilling the gap | Reduced flexibility and rough appearance | Use a controlled, even bead |
| Caulking drainage or movement areas | Can trap water or interfere with function | Leave weep holes and movable joints unsealed |
For renters, caulking may be less suitable than tape or removable weatherstripping unless the property owner approves it. For homeowners, it is often one of the more durable low-cost sealing steps, especially around stationary trim and frame gaps.
Caulking is also a good reminder that weatherization is about fit, not force. The goal is to seal the right openings with the right material, not to fill every visible line in the house.
Conclusion
Small weatherization projects are easy to underestimate because each one looks minor on its own. But sealing a drafty window edge, closing the gap under a door, and caulking a few obvious cracks can add up to a more comfortable home with less wasted energy.
That is part of what makes these projects useful for both homeowners and renters. They are flexible, relatively low-cost, and practical to do in stages. You do not need a full renovation plan to make progress.
If you are deciding where to begin, start with the leak you can feel most clearly. Then move to the next one. That steady approach is often the most realistic path toward better comfort, lower waste, and stronger everyday resilience at home.