Where Heat Pump Retrofits Go Wrong in Older Homes
Retrofitting a heat pump into an older home is rarely as simple as swapping one box for another. Older houses often have a mix of aging ductwork, uneven insulation, drafty rooms, and legacy controls that were designed around a furnace or boiler, not a heat pump.
That is where many projects get into trouble. A system can be technically installed and still perform poorly if the sizing was based on rough rules of thumb, if the ducts cannot deliver the airflow the equipment needs, or if the thermostat is reading the wrong part of the house.
A practical heat pump guide for older homes needs to start with those basics. The goal is not to assume every house needs the same fix. It is to identify the common installation mistakes early enough to avoid comfort complaints, unnecessary add-on costs, and disappointing results after the equipment is already in place.
If you are planning a retrofit, use this article as a pre-installation review list so you can ask better questions before the work begins.
The Importance of Accurate Load Calculations
One of the biggest retrofit mistakes is sizing a heat pump by square footage alone or by matching the capacity of the old system. In older homes, that shortcut can be especially misleading because insulation levels, air leakage, window condition, and room-by-room heat loss may vary a lot.
Industry-standard guidance commonly points to ACCA Manual J as the baseline method for residential load calculations. That matters because a proper calculation looks beyond floor area and accounts for the actual construction details of the house, including insulation assumptions, air sealing, orientation, and other factors that affect heating and cooling demand.
An undersized system may struggle during the most demanding weather and lean more heavily on backup heat when one is present. An oversized system can create a different set of problems, including short cycling, uneven temperatures, and less efficient operation. In an older home, either mistake can be amplified by weak ducts or a leaky building envelope.
A useful way to think about sizing is this:
| Shortcut approach | Better retrofit approach |
|---|---|
| Match the old furnace size | Recalculate the home's actual heating and cooling loads |
| Use square-foot rules | Use Manual J or equivalent professional load analysis |
| Assume insulation is "average" | Verify attic, wall, and crawlspace conditions where possible |
| Size for one problem room only | Look at whole-house needs and room distribution |
If a contractor is proposing equipment, ask what assumptions were used. In older homes, hidden conditions matter. A house with partial insulation upgrades, sealed attic bypasses, or major air leaks may need a different system than a similar-looking house next door.
Before installation, it helps to confirm these points:
- Was a formal load calculation done rather than a rule-of-thumb estimate?
- Were insulation levels verified instead of guessed aggressively?
- Were planned envelope upgrades included in the calculation if they will happen before or during the project?
- Was the system selected with the home's coldest and hottest conditions in mind, not just average weather?
This is also where the common heat pump vs furnace comparison can become misleading. A furnace retrofit often tolerated oversized equipment and high-temperature air delivery. Heat pumps usually depend more on correct sizing and steady operation. That does not make them unsuitable for older homes. It means the design work matters more than many homeowners expect.
Ductwork Compatibility and Retrofitting Challenges
A second major mistake is assuming existing ducts are automatically ready for a heat pump. Older duct systems may have leaks, poor insulation, crushed sections, undersized returns, or layouts that were barely adequate for the previous equipment.
That can become a real performance issue because heat pumps rely on proper airflow. If the ducts cannot move enough air, the system may struggle to heat or cool evenly, run longer than expected, or create comfort complaints that are blamed on the equipment when the duct system is the real bottleneck.
A duct assessment should look at more than whether ducts simply exist. It should check condition, sizing, sealing, insulation, and whether supply and return paths make sense for the new system. In some older homes, selective repairs and sealing may be enough. In others, parts of the duct system may need to be redesigned or replaced.
Watch for these warning signs before a retrofit:
- Rooms that were always too hot or too cold with the old system
- Noticeable air leakage at duct joints or boots
- Ducts running through very hot or very cold unconditioned spaces without adequate insulation
- Limited return air pathways, especially in closed-off rooms
- Old flex duct or sheet metal runs with obvious damage, kinks, or disconnected sections
If your contractor says the heat pump can use the existing ducts, ask a follow-up question: what testing or inspection supports that conclusion?
A simple planning sequence can help:
- Inspect the duct system for leakage, damage, insulation, and layout problems.
- Verify whether airflow requirements for the proposed heat pump match what the ducts can deliver.
- Fix sealing and insulation problems first if the duct system is otherwise usable.
- Rework undersized or poorly routed sections if airflow is still inadequate.
- Check whether local utility or government programs offer rebates for duct sealing or related efficiency upgrades.
This is one of the clearest places where home energy efficiency work and HVAC work overlap. Duct sealing and insulation upgrades can improve delivered comfort even before the new equipment is installed.
For some households, this is also a budget-planning issue. If you are comparing a heat pump retrofit with other resilience purchases, such as a portable power station for outages, it helps to understand that hidden duct repairs can change the project scope. That does not mean the upgrade is a bad idea. It means older-home retrofits should be priced as a system, not just as equipment replacement.
Thermostat Placement and System Integration
Thermostat mistakes are easy to overlook because the device seems small compared with the rest of the system. But poor thermostat placement or incompatible controls can undermine an otherwise solid installation.
In older homes, thermostats are often located where they made sense for a previous heating system, not where they will give the best reading for a heat pump. A thermostat placed in direct sun, near a drafty door, above a radiator remnant, or close to a kitchen can read temperatures that do not reflect the rest of the house.
That can lead to short cycling, over-conditioning, or rooms that never feel quite right. If one hallway is warmer than the bedrooms, for example, the thermostat may satisfy early while the occupied rooms stay uncomfortable.
Placement problems to avoid include:
- Direct sunlight during part of the day
- Exterior walls with drafts or temperature swings
- Areas near supply registers or returns that distort the reading
- Spots close to ovens, lamps, electronics, or other heat sources
- Hallways or corners with very different airflow from the main living areas
System integration matters too. Not every existing thermostat setup is ideal for a new heat pump. Controls need to be compatible with the equipment and configured correctly so staging, backup heat behavior, and temperature sensing work as intended.
Use this quick check before installation:
| Thermostat issue | Why it matters | What to ask |
|---|---|---|
| Bad location | Reads the wrong temperature for the occupied space | Can it be moved to a more representative area? |
| Legacy thermostat assumptions | Old settings may not suit heat pump operation | Is a compatible control strategy included? |
| Nearby drafts or heat sources | Causes false calls for heating or cooling | Has the installer checked for local temperature bias? |
| Uneven room temperatures | One sensor may not reflect the whole house | How will the system be balanced after startup? |
A good installation is not just about where the thermostat goes on the wall. It is also about startup and commissioning. The installer should confirm the controls are communicating properly with the system and that the house is responding in a stable, predictable way after installation.
Insulation and Weatherization Upgrades for Older Homes
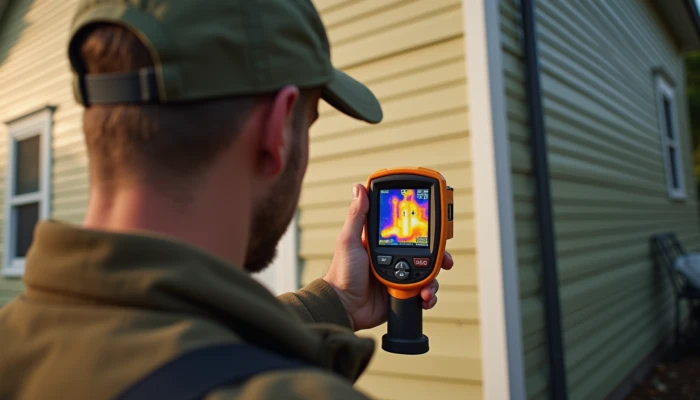
Even a well-designed heat pump can struggle if the house itself is losing heat too quickly in winter or gaining too much in summer. That is why insulation and air sealing deserve attention during retrofit planning, especially in older homes.
This does not mean every house needs a full gut renovation before a heat pump can work. It does mean the building envelope should be part of the conversation. Practical guidance often emphasizes weatherization first or at least weatherization alongside equipment planning, because attic insulation, wall insulation, crawlspace work, and air sealing can all affect the final load calculation and the comfort outcome.
The most useful approach is usually to prioritize the biggest weaknesses rather than trying to do everything at once.
Common upgrade areas include:
- Attic or loft insulation where heat loss is significant
- Air sealing around windows, doors, attic penetrations, and utility openings
- Crawlspace or basement sealing and insulation where applicable
- Wall insulation improvements where feasible and cost-effective
If you are sequencing work, a practical order often looks like this:
- Identify major drafts and insulation gaps.
- Complete the most important air sealing and insulation work that is realistic before equipment sizing is finalized.
- Revisit load assumptions so the heat pump is not sized around avoidable heat loss.
- Install and commission the system with the updated house conditions in mind.
This is especially important in older homes where one room may have been renovated and insulated while another remains largely unchanged. Mixed conditions can create misleading assumptions if no one verifies them.
The key is to avoid two extremes:
- Assuming insulation does not matter because the new equipment will solve everything
- Assuming the home must be made perfect before a heat pump is worth considering
Most homes fall somewhere in between. The practical goal is to improve the envelope enough that the system can operate more effectively, while keeping the project aligned with the household's budget and priorities.
Conclusion
Older homes can absolutely be candidates for heat pump retrofits, but they are less forgiving of design shortcuts. The most common problems usually start before the equipment is turned on: rough sizing, overlooked duct limitations, and thermostat decisions that do not match how the house actually behaves.
If you want to avoid expensive rework, focus your questions on three areas first:
- Was a real load calculation completed?
- Was the duct system evaluated for airflow, leakage, and insulation?
- Was thermostat placement and control compatibility reviewed as part of the installation plan?
Then look at the house itself. Targeted insulation and weatherization upgrades can support better comfort and more reliable operation, especially in drafty or uneven older homes.
The best next step is usually a contractor or home performance professional who is comfortable treating the retrofit as a whole-house project, not just an equipment swap. That kind of planning will not make every home identical, but it does reduce the odds of the most common installation mistakes.