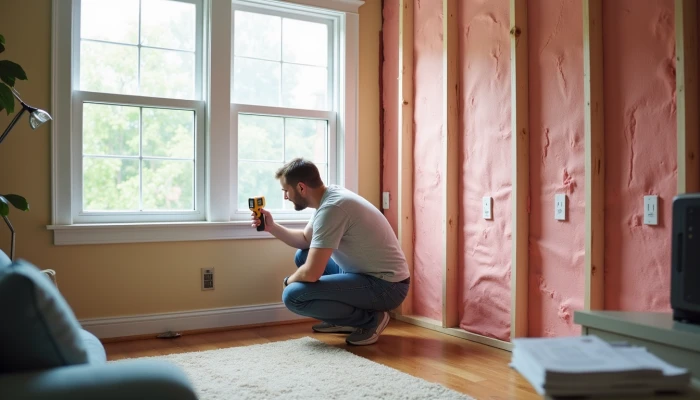
How to Check Your Home for Energy Waste Before Paying for Upgrades
Before you add insulation, replace equipment, or think about backup power, it helps to know where your home is actually losing energy. A DIY home energy audit gives you a clearer picture of comfort problems, wasted electricity or fuel, and which fixes are worth prioritizing first.
For homeowners and renters, that matters because many energy problems are visible with simple tools and a careful walkthrough. You do not need to guess, and you do not need to jump straight to expensive retrofits.
This kind of audit also supports home energy resilience. A tighter, better-insulated home is usually easier to keep comfortable during outages, easier to heat and cool efficiently, and easier to pair with future upgrades like a heat pump, a battery backup for home, or even a portable power station for short interruptions.
Use this guide as a practical first pass. It will not replace a full professional assessment, but it can help you find obvious problems, organize your next steps, and avoid spending money in the wrong order.
Evaluate Insulation Effectiveness
Insulation is one of the first places to check because missing or underperforming insulation can make heating and cooling systems work harder than necessary. Your goal is not to calculate every wall assembly perfectly. It is to identify obvious weak spots and compare what you have to climate-appropriate benchmarks.
Start with the areas you can safely access, such as an attic, basement, crawl space entry, or utility room. Look for insulation that is thin, uneven, compressed, wet, or missing entirely. In attics, pay attention to whether insulation fully covers the floor area and whether there are bare patches around eaves, hatches, or mechanical penetrations.
R-value recommendations vary by climate zone, and common guidance emphasizes using climate-based benchmarks rather than assuming one target works everywhere. In general, colder regions call for higher attic and wall R-values than warmer regions. If you do not know your climate zone, you can use Department of Energy climate zone maps or local code references as a starting point.
Use this quick insulation checklist during your walkthrough.
- Check attic insulation depth and coverage.
- Look for gaps around wiring, pipes, chimneys, and attic hatches.
- Inspect basement or crawl space rim joists for exposed areas.
- Look for insulation that has slumped, shifted, or been compressed.
- Note any signs of moisture, staining, or mold-like discoloration that may reduce performance.
- Compare visible insulation levels with climate-zone guidance rather than guessing.
A simple way to organize your notes is to score each area by condition.
| Area | What to look for | Simple rating |
|---|---|---|
| Attic | Even coverage, no bare spots, no compression | Good / Needs review / Priority issue |
| Exterior walls | Cold wall surfaces, patchy fill if visible during repairs | Good / Needs review / Priority issue |
| Floors over unconditioned space | Drafty floors, exposed cavities, missing batts | Good / Needs review / Priority issue |
| Basement or crawl space | Exposed rim joists, uninsulated walls or floor above | Good / Needs review / Priority issue |
If you are renting, you may not be able to open cavities or add insulation yourself. But you can still document visible issues, cold surfaces, and drafty floors to discuss with a landlord or property manager.
Assess HVAC System Efficiency
Your heating and cooling system can waste energy even if the equipment itself is still functional. A DIY audit should focus on signs that conditioned air is being lost, distributed unevenly, or measured poorly.
Begin with the thermostat. Check whether it is placed near a sunny window, supply vent, exterior door, kitchen appliance, or other heat source. Poor placement can cause the system to cycle at the wrong times because it is reading a temperature that does not reflect the rest of the home.
Next, inspect accessible ductwork, especially in attics, basements, garages, or crawl spaces. Look for disconnected joints, loose tape, damaged insulation, or sections that run through very hot or cold unconditioned spaces. If ducts leak before air reaches the rooms you use, the system may run longer without improving comfort.
If you have access to a thermal imaging camera, or can borrow one from a library or tool lending program, it can help you spot uneven temperatures around ducts, registers, ceilings, and exterior walls. Thermal imaging guidance commonly notes that infrared tools are most useful for locating patterns and problem areas quickly, not for diagnosing every issue on their own.
During this part of the audit, look for these common signs.
- Rooms that are consistently warmer or cooler than the rest of the home.
- Supply registers with weak airflow.
- Return grilles blocked by furniture or dust buildup.
- Duct insulation that is torn, missing, or poorly attached.
- Outdoor equipment obstructed by debris or vegetation.
- Air filters that are dirty enough to restrict airflow.
It also helps to separate maintenance issues from upgrade decisions. A clogged filter or blocked vent is not the same as needing a full system replacement. Likewise, uneven temperatures may point to duct leakage, insulation problems, or air sealing issues rather than a bad furnace or heat pump.
If your audit later leads you toward electrification, this step gives useful context. A future heat pump will perform better in a home with reasonable air sealing, insulation, and distribution. The same logic applies if you are planning for outage resilience with a solar generator or other backup setup: reducing heating and cooling waste lowers the amount of backup power you may need.
Detect Air Leaks and Drafts
Air leakage is often one of the easiest problems to find and one of the most practical to address. Even small gaps can affect comfort, indoor temperature stability, and how hard your HVAC system has to work.
You do not need specialized audit equipment to start. A smoke pencil, incense stick, or even a thin strip of tissue can help reveal moving air around common leak points. On a cooler or windier day, slowly move the smoke or tissue around windows, exterior doors, baseboards, attic hatches, plumbing penetrations, recessed lights, and electrical outlets on exterior walls.
If the smoke wavers sharply or gets pulled in one direction, that suggests air movement. The goal is not a perfect measurement. It is to identify where sealing work may matter most.
Focus your inspection on these areas.
- Window frames and sash edges.
- Exterior door weatherstripping and thresholds.
- Plumbing and wiring penetrations under sinks and behind appliances.
- Recessed lighting below unconditioned attic space.
- Fireplace surrounds and dampers.
- Duct penetrations and boot connections.
- Attic access panels and pull-down stairs.
- Electrical outlets and switch plates on exterior walls.
Thermal imaging can also help here, especially when indoor and outdoor temperatures are meaningfully different. Cold streaks or hot patches near openings can point to infiltration paths that are hard to see directly.
One useful way to keep this manageable is to log each leak by impact and difficulty.
| Location | Likely impact on comfort/energy use | DIY difficulty |
|---|---|---|
| Door weatherstripping | to high | Easy |
| Window trim gaps | Easy to moderate | |
| Plumbing penetrations | Moderate | |
| Attic hatch | High | Easy to moderate |
| Recessed lights or hidden chases | to high | Moderate to advanced |
This helps you prioritize easy sealing tasks first while flagging bigger air leakage pathways for later review. If you find major leakage around attic bypasses, duct runs, or hidden cavities, that may be a good point to bring in a professional energy auditor.
Analyze Utility Bills for Energy Patterns
Your utility bills can show patterns that a room-by-room walkthrough might miss. They will not tell you exactly where a problem is, but they can help you spot when usage changed, whether seasonal swings are unusually sharp, and whether your home may have a persistent efficiency issue.
Gather at least 12 months of electric, gas, or fuel bills if possible. Then look at total usage, not just total cost, since rates can change over time. Mark months with unusually high consumption and ask what changed. Was there a cold snap, a heat wave, a new appliance, a work-from-home shift, or a mechanical problem?
A basic review can be done in three steps.
- Compare one month to the same month in the previous year if you have enough history.
- Separate seasonal loads from year-round loads.
- Look for sudden jumps that do not match weather or occupancy changes.
Weather normalization is especially helpful. Energy analysis guidance often recommends adjusting for outdoor temperature so you do not mistake normal winter or summer demand for a hidden problem. Some utilities provide usage dashboards, degree-day comparisons, or downloadable interval data that make this easier.
Use a simple tracking sheet like this.
| Month | Energy use trend | Weather note | Possible explanation |
|---|---|---|---|
| January | Higher than expected | Colder than usual | Weather, air leaks, heating issue |
| April | Stable | Mild | Baseline month for comparison |
| July | Sharp spike | Hotter period | Cooling load, duct issue, thermostat setting |
| October | Sudden increase | Mild | Equipment fault, water heater issue, behavior change |
Also pay attention to your baseline load. If your usage stays high even in mild months, that can suggest always-on appliances, standby loads, water heating issues, dehumidification, or poor equipment scheduling.
This step is useful because it helps you avoid chasing the wrong fix. If your bills show a winter-heavy problem, insulation, air sealing, and heating system checks may deserve priority. If the issue is year-round, the answer may be elsewhere. Either way, bill analysis gives your DIY audit a broader view than a single-day walkthrough.
Conclusion
A useful home energy audit does not need to be complicated. If you check insulation, review your HVAC setup, look for air leaks, and study your utility bills, you can usually identify the biggest problem areas before spending money on larger upgrades.
The most practical next step is to rank what you found.
- Fix obvious air leaks first.
- Address missing or damaged insulation where access is straightforward.
- Catch maintenance issues such as dirty filters or disconnected ducts.
- Save larger equipment decisions until you understand the building shell.
That sequence will not solve every problem, but it gives you a more grounded starting point. It can also make future decisions about efficiency upgrades, electrification, or backup power more realistic.
If your audit uncovers hidden moisture, major duct problems, combustion safety concerns, or widespread comfort issues that are hard to explain, that is a good time to bring in a qualified professional. A DIY audit is most valuable when it helps you ask better questions and prioritize the right fixes.